

How Do You Make Animations For Your Sims 4 Character
This tutorial will explain to yous basics virtually creating animations for The Sims four using Blender.
This tutorial is safe for people who never used Blender. Keep in mind that this is not the most optimal way to utilise Blender. You should consider looking up professional tutorials to learn more.
1. Download Blender
> Blender 2.79b - Download
2. Download Sims four Rigs
> Edited Male and Female Rig - Download
These are heavily edited Sims rigs that support custom tongue, penis, testicle, anus, and vagina movement. Y'all're free to use any other The Sims 4 rigs you can find.
Downloaded files with extension '.blend' can now be loaded direct to Blender.
3. Open rigs in Blender
Rig files with extension '.alloy' can be just loaded to Blender. After y'all install Blender, open one of the downloaded rigs.
In this tutorial but the 'YOURNAME_Animation_Name_male' and 'YOURNAME_Animation_Name_female' files will be used.
3.ane. Rig Technical Details
The rig comes with double usage of certain basic depending if you're animating a male or female Sim.
- The vagina is animated using the 'b__Penis_Testicles', 'b__Penis_L_Testicle, 'b__Penis_R_Testicle' bones. Female person Sim trunk has two dynamically switching models, one that has an animated vagina and one that doesn't have an blithe vagina. The body used depends on the variable prepare in the actor XML ("animation_has_animated_vagina"). Past default all animation actors DON'T use the animated vagina model to prevent problems with unwanted vagina motion if a role was designed for Female+BOTH with testicle movement due to the bones being shared. If the male is blithe with testicle movement, make certain to not let animated vagina or foreclose the role from being occupied by a female Sim.
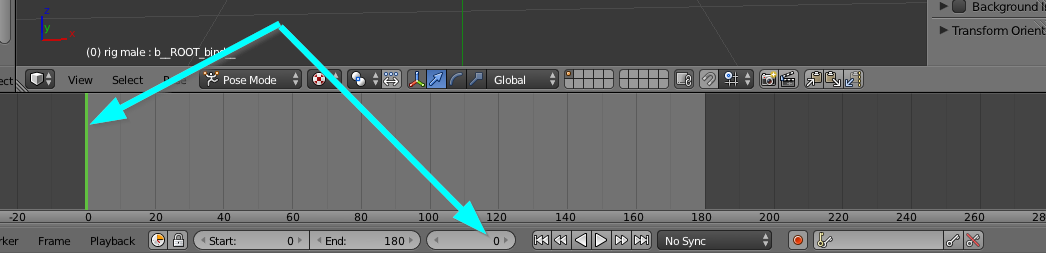
four. This is the animation timeline
You lot use the timeline to move the time of your animation and add keyframes. To actually interact with created keyframes you need to use the 'Dope Canvass' which will exist explained later. Below the timeline, you will find numbers labeled 'Start' and 'Stop'. 'Get-go' is the frame your blitheness starts with and it always has to exist fix as 0. 'Cease' is the frame that your animation ends with (duration or your animation). Annotation that this only applies to Blender and if you add keyframes past the animation duration they will be counted by Sims4Studio when exporting.
5. This is the Dope Canvass

On the left, you lot tin can modify the visible editor to 'Dope Sheet' and switch the mode to the 'Action Editor'. Dope Sheet/Action Editor is like an advanced timeline where you tin move, copy and delete existing keyframes. More on that later.
6. This is your camera
Moving camera in Blender can be actually complicated and in that location is a lot to learn well-nigh information technology, only here are the nuts. By property theCenter Mouse Button yous can rotate the camera around. With the Scroll Wheel, you can motion forrard or backward. While property theShift push button and property theMiddle Mouse Button at the same time you can motility in space. This is in no way the well-nigh optimal way of operating the camera in Blender, but it should be enough for beginners.
vii. These are bones
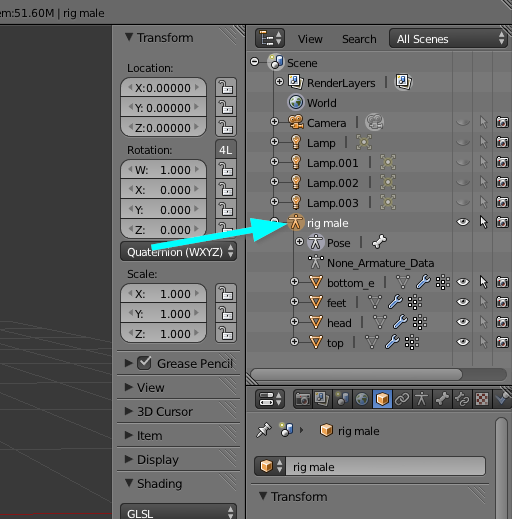
Before animating rigs, brand sure to always select ane by clicking on the icon of the player you desire to modify. The screenshot higher up shows the 'Outliner' which contains all the objects in your scene. Whatsoever icon with a circle on information technology means that it is selected as the agile object you lot're modifying.
All the black dots on the Sim model are called 'basic'. Y'all tin select whatsoever bone by using theRight Mouse Button, it will get highlighted when it is selected.
8. Rotating bones
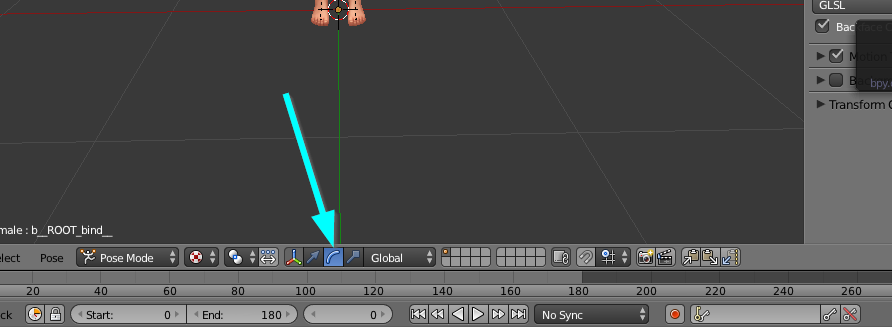
For purposes of this tutorial, we will be using the Rotation Tool, but this is non the only way to rotate bones. To enable the Rotation Tool y'all need to click on the icon showed on the screenshot above. If you don't run across the icon pointed past the arrow, click on the icon on the left, with lines colored in red, blue and green, to brand the 'Rotation Tool' icon visible. To move bones (don't do this) you need to use the 'Translation Tool' which will exist explained later in this tutorial.
Once you select the 'Rotation Tool' and ane of the bones, you tin can rotate it by dragging one of the colored lines that are displayed effectually the bone. Effort selecting unlike bones and encounter what you can move.
nine. Fifty-fifty more than rotating bones

Some basic can be clicked multiple times to access unlike bones that are placed in the same spot. An example is an eye, which with every click allows you lot to move the upper lid, lesser lid and the eye itself. To know that you're selecting different bones, look at the name of the selected bone that is displayed at the bottom left corner of the 3D View.
10. Import second histrion (or more)
Importing actors and objects allows y'all to align everything properly in one blitheness. Note that yous can't export the blitheness with multiple actors, but more on that later.
To import actors or objects:
10.one. Click 'File' -> 'Suspend'.
10.ii. Pick blend file that contains the role player/object you want to add (for example the female person rig).
10.3. Open 'Objects' folder and select the rig and body parts (rig, caput, top, lesser, feet). To select multiple things hold theShift key and click the things from the list.
10.four. Click the 'Link/Append from Library' button.
You can import as many actors/objects as you desire to one animation.
Call back that afterwards importing actors (Sims) and/or objects y'all need to switch them to the 'Pose Manner'.
11. Movement actors around
To movement actors you need to select the root os. In that location is aught that would signal the right 1, you have to find it yourself and call back which one is it (for reference look at the video above). Once the root bone is selected, switch to the 'Translation Tool' and motility the sim by dragging ane of the colored arrows effectually the selected bone.
Remember to never movement objects, only actors!
12. First keyframe
A keyframe is basically a frame/pose of your animation. You can empathize it as a pose that your Sim is at, before moving into some other pose (keyframe).
The outset frame has to start from the starting time frame position, and then make sure your timeline is gear up to the farthest left. In add-on, the screenshot in a higher place shows your active selected frame which should be displayed as "0" (zero). To create a keyframe you have to select all actor basic you lot're creating the keyframe for. Select the rig of the histrion and hover over its model with your mouse. Press the " a" key on your keyboard to select all the basic, they should lite upwardly. And so press the " i" primal on your keyboard and select 'LocRot' from the list. This saves all of the basic rotation values in a form of a keyframe.
That's information technology, the get-go frame of your animation is done.
When you want to add together more keyframes: 1. Move the active frame on the timeline few frames forward. 2. Move bones of the histrion to make a new pose. 3. Select all the basic and 'LocRot' again.
13. Delete, move and copy keyframes
To move, re-create and delete keyframes you demand to use the 'Dope Canvas'. There are multiple ways y'all can select keyframes on the 'Dope Sheet', just yous merely need 1 to learn the basics. To select a keyframe (whole cavalcade with all the bones), concord the Alt key and click one of the diamond shapes with theCorrect Mouse Push. They will low-cal up in orange when they are selected. While a keyframe is selected use: Fundamental the " g" button to motility selected keyframe and place it somewhere else. Concord the Shift central and press the "d" central to copy selected keyframe and place it somewhere else. Printing the Delete key to delete the selected keyframe. Y'all tin can select multiple keyframes if yous concord theShift andAlt keys together and click theRight Mouse Button on keyframes.
14. Handle multiple actors

Every rig has its own timeline with keyframes which ways that you can't consign one blitheness with multiple actors. Every actor has to have its ain animation file, so once you lot're done with your animation, save and close Ble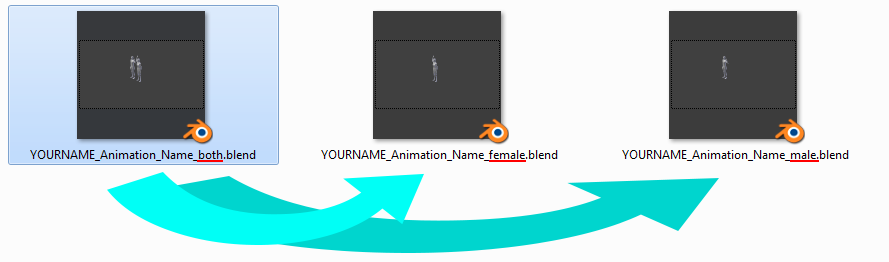
Create a re-create of your animation file per actor in your animation. For example, if you have two actors (a male and a female person), create two copies. Then open up each copy and remove other actors from it, leaving only one actor per animation file. Removing an actor ways removing its rig from the file. The video above shows how to remove the model likewise, simply that is not required. To select multiple things, concur theShift primal.
15. Exporting animations
Check the 'Converting Blender Animations to Clips' tutorial on how to turn blend files into clips and prune headers to utilize them in the game.
Final update: June 2nd, 2022
Source: https://turbodriver.itch.io/wickedwhims/devlog/139574/creating-basic-animations-in-blender-1
Posted by: nealshaterinew1954.blogspot.com
0 Response to "How Do You Make Animations For Your Sims 4 Character"
Post a Comment